R1 Chris
Member
- Joined
- Aug 8, 2008
- Messages
- 842
- Reaction score
- 3
Start by removing headliner. Once headliner is removed measure out the space for your amplifiers. Then you need to weld up a steel amp rack for the amps to mount to. Depending on the size of the amp, you will want to use thicker steel. I used one inch by 1/2 inch square stock. Keep in mind the amp needs to be bolted through 4 structure points. After you have welded your amp rack, mount the amps to it.
After amps have been test fitted and mounted, pull the rack back out, prime and paint. You will then need to start to pre wire the truck. Now while you have the headliner out it would be a good idea to Dynamat the interior roof.

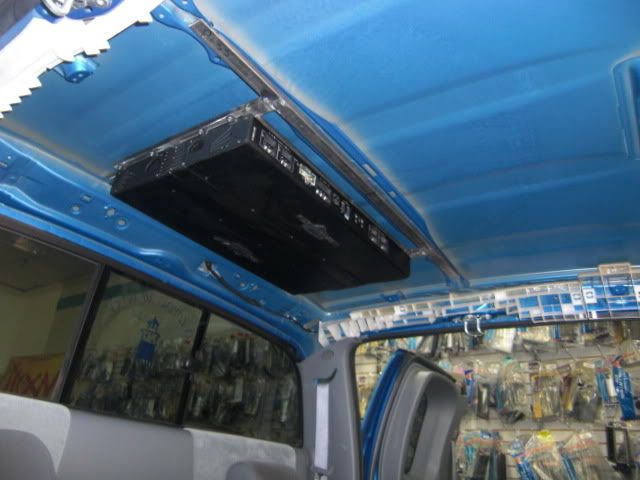
Next step is to reinstall the headliner and trace out the location of the amps and cut headliner to expose the amplifiers.
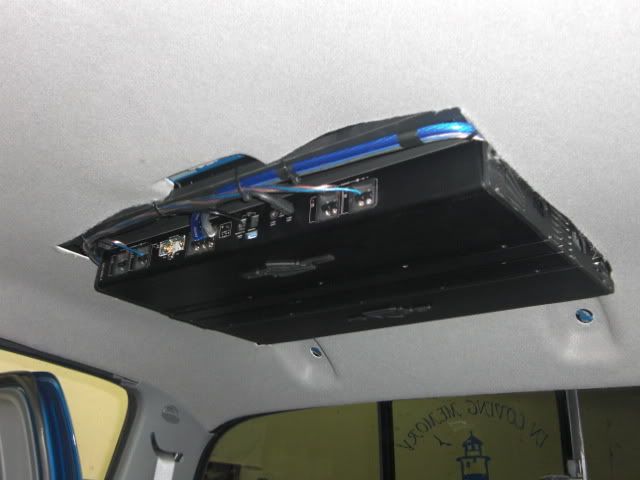
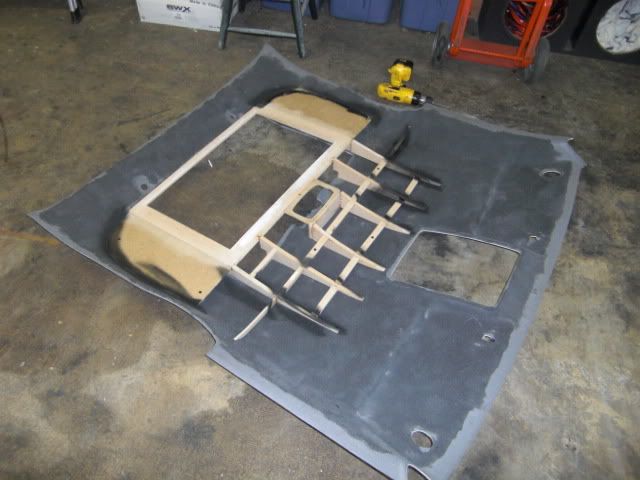
Once your done with that, you will want to fabricate a wood frame to flush in the amp. Dont forget to tape up your amplifier to protect it from any damage that may occur during install. At this point in the install the framing will need to be attached to the factory headliner.

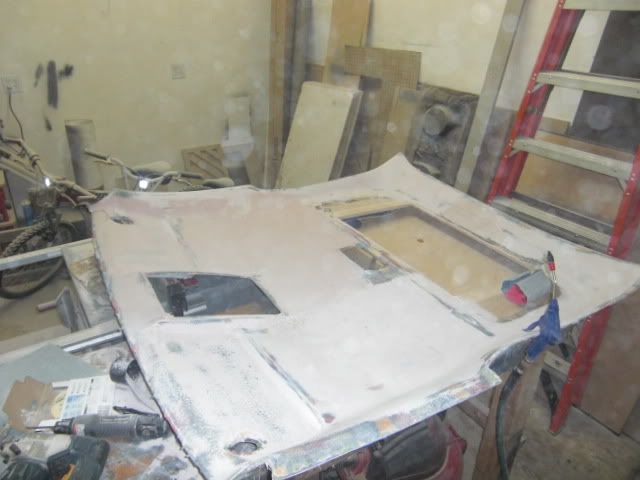
You will now need to use fiberglass resin and apply it to the factory headliner while it is still in its place in the truck to maintain its shape while it dries. Please note that in the following picture it was removed after it had completely dried.
For the next step you will need to pick up fleece material. This material should be used to wrap the entire headliner. Color of the fleece does not matter and will be covered later. Fleece will usually run about $10-15 a yard. You will also need to staple along the wooden frame to contour the shape of the headliner. Apply heavy amounts of fiberglass resin to the fleece, making sure it soaks completely through the material.
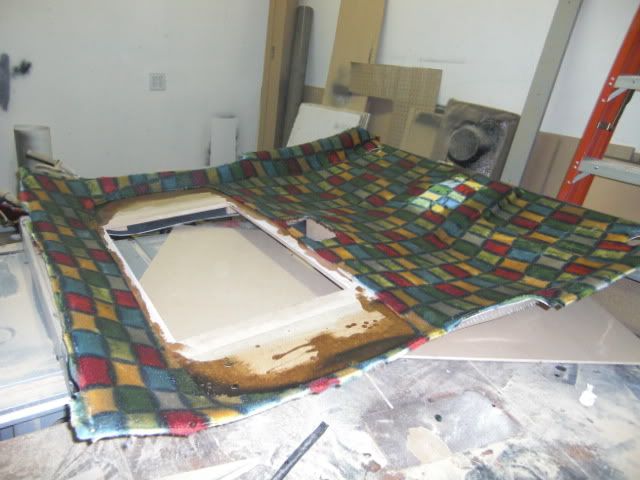
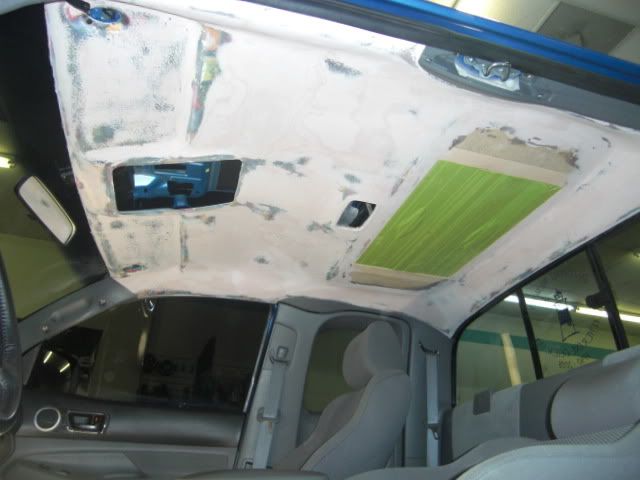
Be sure to allow ample time for drying. Then you will need to grind down fiberglass high spots and apply body filler (bondo). This step will take several layers of bondo to shape and fill in any problem spots.
Next put the headliner back in to ensure a proper fit.
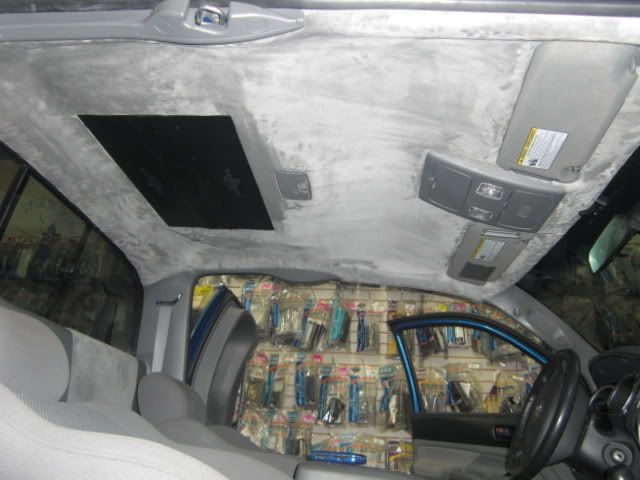
After you have achieved the look you are going for and there are not any high or low spots in your piece, you can remove it from the truck and wrap it with your choice of material. For my truck I choose a color matched suede. When using suede be sure to glue both material and origional, modified headliner to ensure a long lasting bond. Nobody likes a droopy headliner.
Good luck with yours and I hope this helps! :rock:
After amps have been test fitted and mounted, pull the rack back out, prime and paint. You will then need to start to pre wire the truck. Now while you have the headliner out it would be a good idea to Dynamat the interior roof.
Next step is to reinstall the headliner and trace out the location of the amps and cut headliner to expose the amplifiers.
Once your done with that, you will want to fabricate a wood frame to flush in the amp. Dont forget to tape up your amplifier to protect it from any damage that may occur during install. At this point in the install the framing will need to be attached to the factory headliner.
You will now need to use fiberglass resin and apply it to the factory headliner while it is still in its place in the truck to maintain its shape while it dries. Please note that in the following picture it was removed after it had completely dried.
For the next step you will need to pick up fleece material. This material should be used to wrap the entire headliner. Color of the fleece does not matter and will be covered later. Fleece will usually run about $10-15 a yard. You will also need to staple along the wooden frame to contour the shape of the headliner. Apply heavy amounts of fiberglass resin to the fleece, making sure it soaks completely through the material.
Be sure to allow ample time for drying. Then you will need to grind down fiberglass high spots and apply body filler (bondo). This step will take several layers of bondo to shape and fill in any problem spots.
Next put the headliner back in to ensure a proper fit.
After you have achieved the look you are going for and there are not any high or low spots in your piece, you can remove it from the truck and wrap it with your choice of material. For my truck I choose a color matched suede. When using suede be sure to glue both material and origional, modified headliner to ensure a long lasting bond. Nobody likes a droopy headliner.
Good luck with yours and I hope this helps! :rock: