Welcome!

By registering with us, you'll be able to discuss, share and private message with other members of our community.

SignUp Now!

Write-Up: NEW Gauge LED Change

stretch200

New Member
Joined
Jan 13, 2007
Messages
638
Reaction score
0
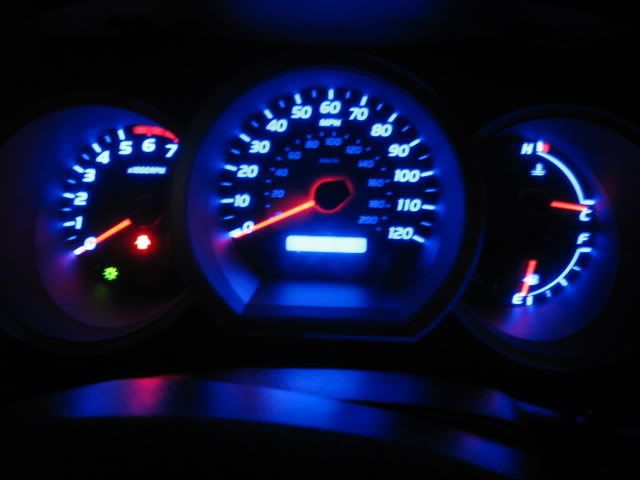
Alright, so I finally did the gauge light change and took lots of pictures.

First thing, my truck is really dirty. I apologize for that. It's been raining and I work outside in the mud. Its horrible.

Also, I did a very sloppy job on editing the pictures. Just don't worry about it, k? good. :biggrin:

Alright, so first things first. Here is a list of the tools you'll need
flathead screwdriver
Phillips head screwdriver
10mm ratchet (if possible use a ratchet screwdriver. it's easier)
soldering gun (I didn't write-up the soldering. I figured if you haven't soldered, you wouldn't do this mod)

I got the LEDs for this from www.lc-led.com The ones I got where these:
http://www.lc-led.com/View/itemNumber/98

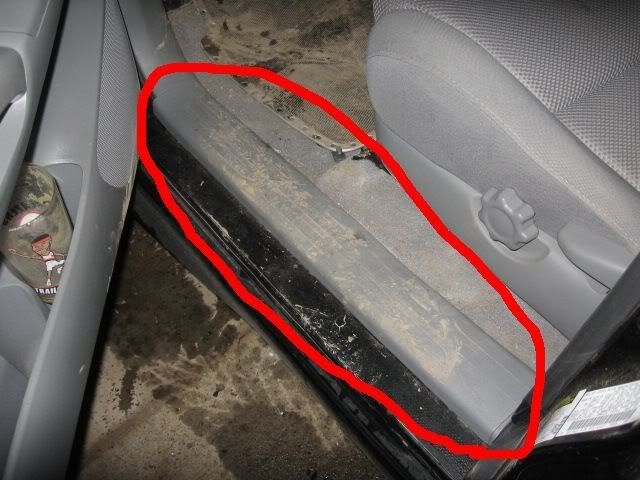
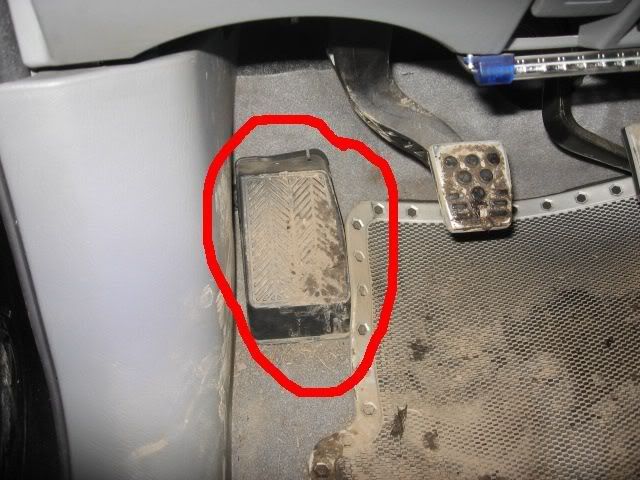
Remove the plastic piece shown in the picture.
dashboard001.jpg


then the foot rest. It just pops off.
dashboard002.jpg


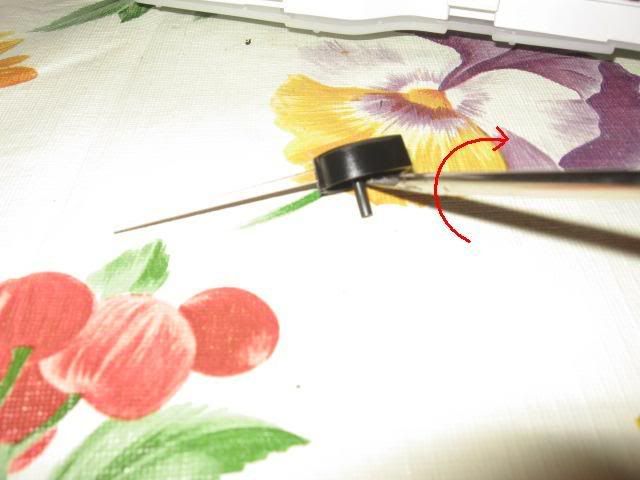
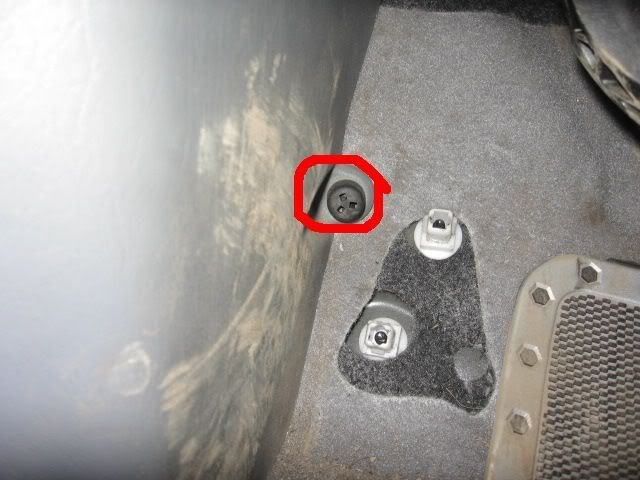
unscrew by hand the knob underneath.
dashboard003.jpg


then remove the kicker. I've marked where you pull it from.
dashboard004.jpg


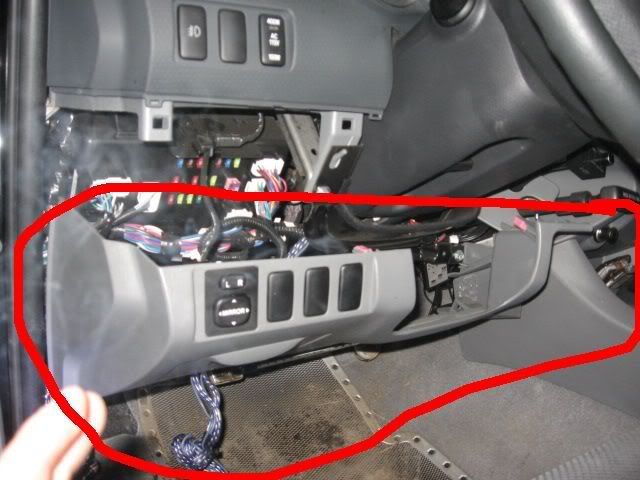
remove this plastic piece.
dashboard005.jpg


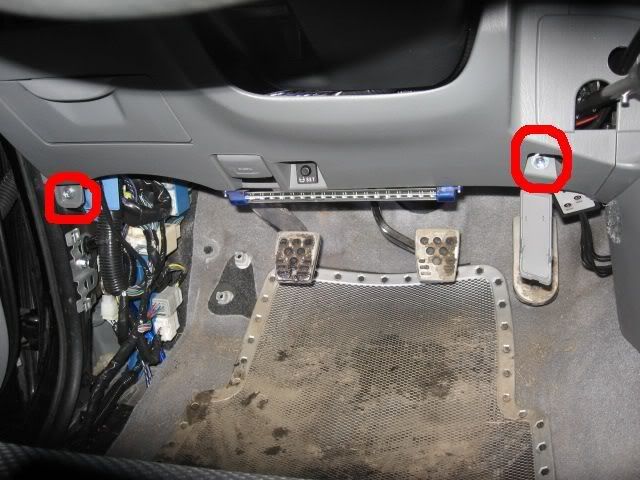
then unscrew these two bolts with a 10mm ratchet. Then pull the lower dashboard straight out, and it pops off.
dashboard006.jpg


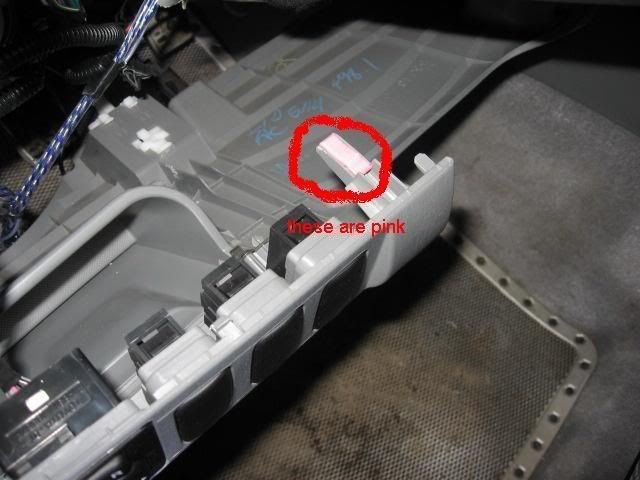
be sure not to lose these clips. They are pink.
dashboard012.jpg


you don't have to fully remove the lower dashboard. I left mine here. (its a biatch to fully remove it)
dashboard007.jpg


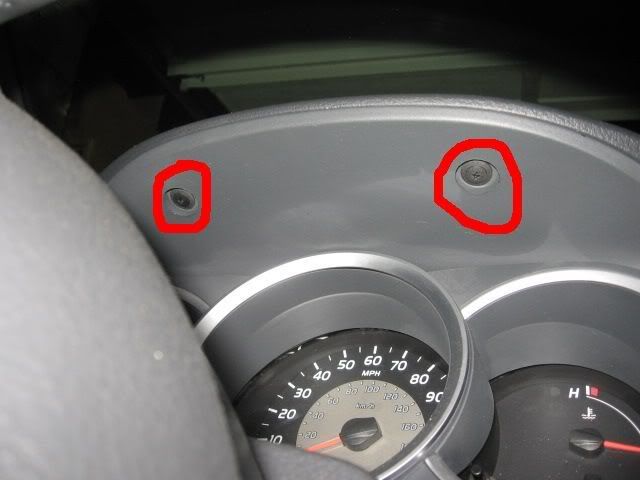
For this step, I lowered the steering wheel as much as I could. It gets in the way of the screwdriver. Remove these two screws. They are make out of plastic so be gentle. there is a clip under the screws that needs to come out also. The best way to do this, is to unscrew the screw almost all the way. and then just pull it out. The clip should come with it.
dashboard008.jpg


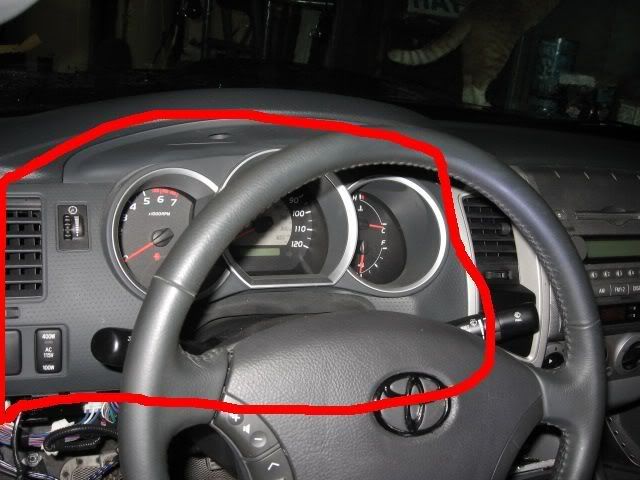
Now pull this piece straight out. It's attached by yellow clips. be sure not to lose those either. They fall out a little easy.
dashboard010.jpg


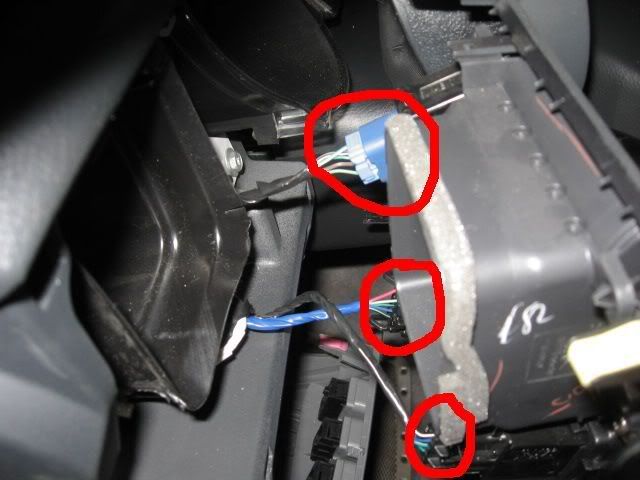
There's not much room but you have to remove these three plugs. Then just wiggle it out towards the driver side and it'll come out. It's awkwardly in there but just work it and you'll be fine. oh man, how dirty did that sound?
dashboard011.jpg


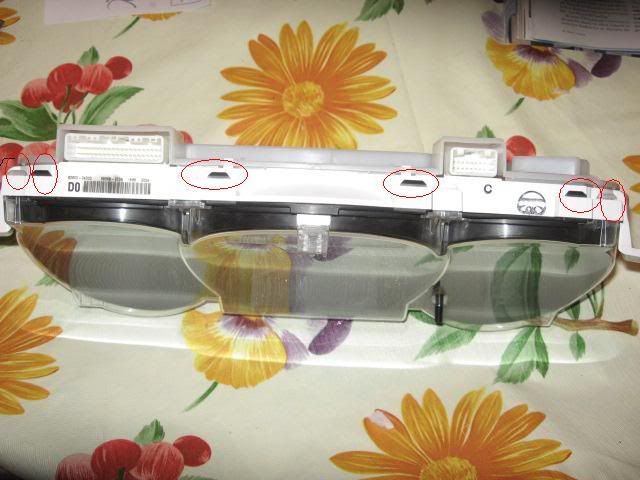
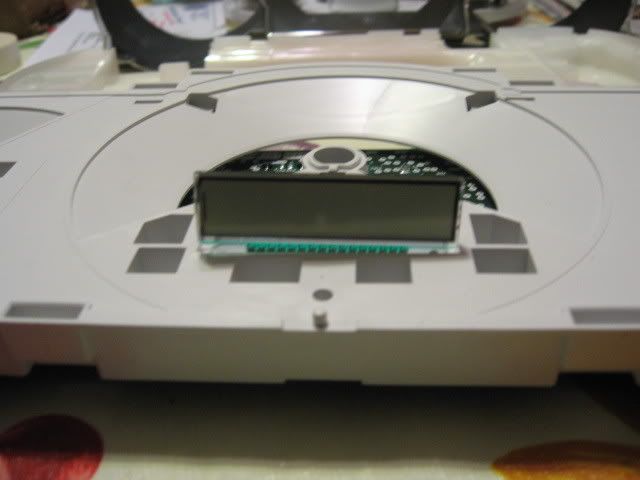
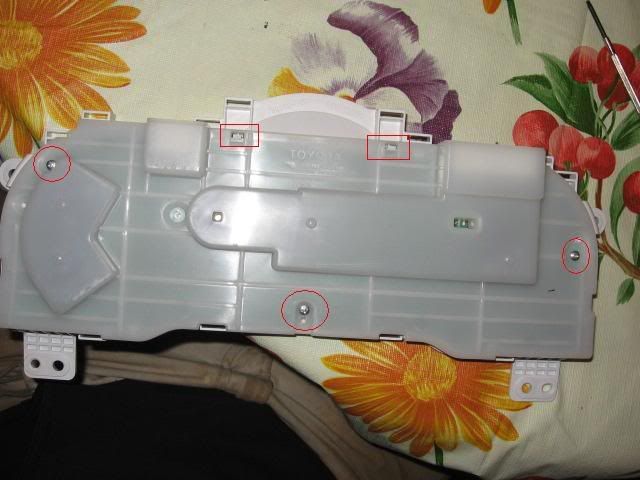
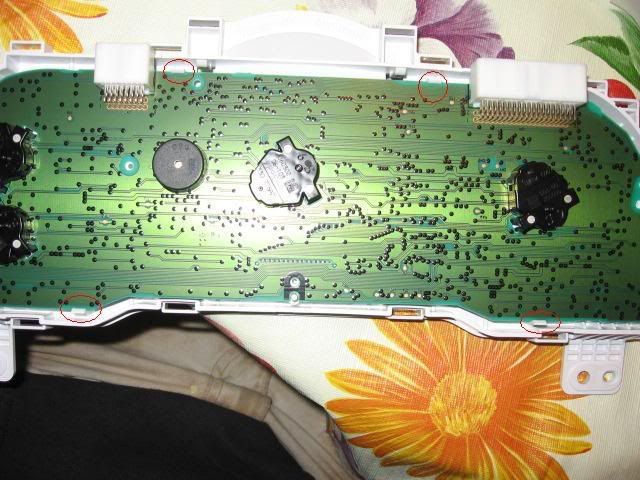
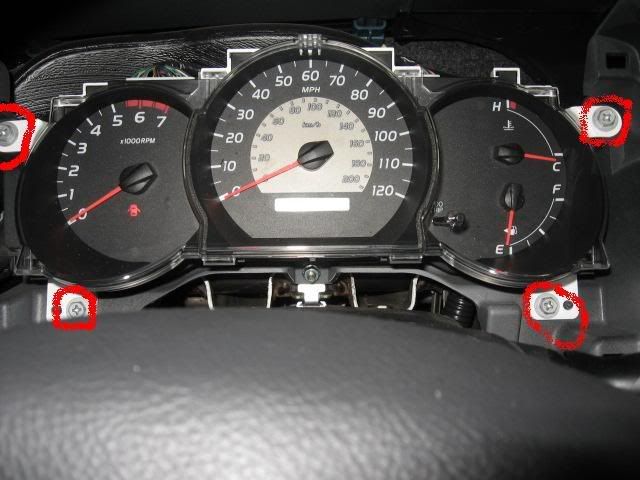
Next, remove these four screws. They are phillips head but also 10mm. It's easier to use a 10mm ratchet.
dashboard014.jpg


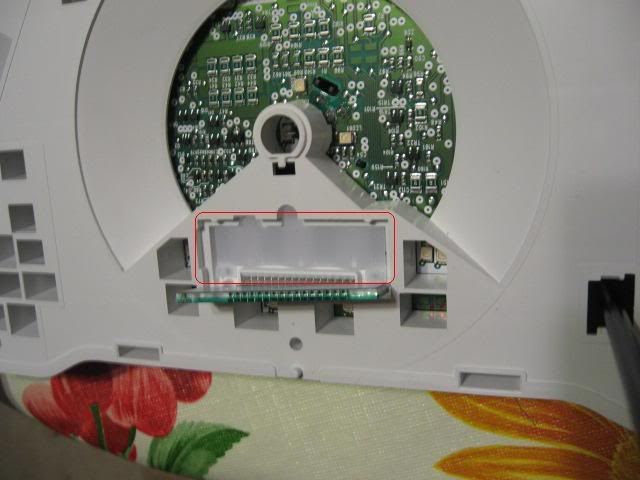
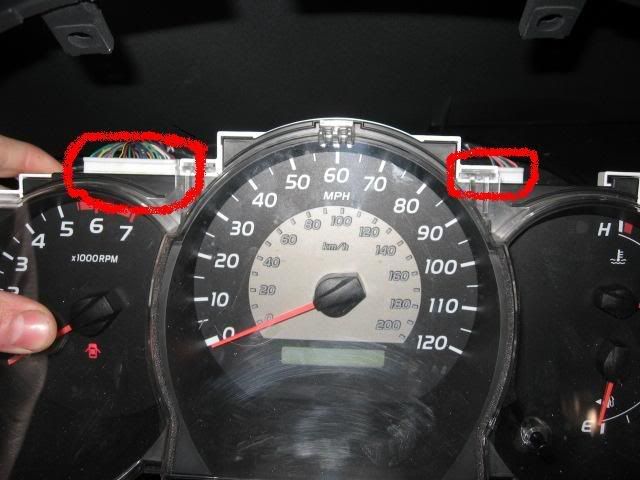
Now, unplug the two connectors on the top. Then pull it out.
dashboard015.jpg
 

stretch200

New Member
Joined
Jan 13, 2007
Messages
638
Reaction score
0
Alright! Now that you have the just the guages, you'll need to remove the front clear piece and black piece. The easiest way to do this is to remove them at the same time. Unhook the clear clips from the back, then the black clips. And work your way around, until it is unhook and can come off.
dashboard016.jpg


next, I put tape underneath the needles to mark where they are. don't mark them yet.
dashboard032.jpg


now you can move the needles up and down.
dashboard018.jpg


But it only goes down to a certain point. That's where you want to mark them on the tape.
dashboard019.jpg


now that you have them marked, you are going to remove the needles. You MUST be careful when doing this. Here is a picture of what I did to get it off.
The arrow represents the movement of the screwdriver, underneath the needle.
dashboard022.jpg


you want to get right next to pillar under the needle as shown in the above picture. Hold the needle to keep it from bending or breaking to one side. You want to keep the screwdriver from putting too much pressure on one side of the needle. remember, BE VERY CAREFUL. And don't force it. Mild preassure should get it off.

Alright, next remove the black plastic cover piece with the tape on it.
dashboard032.jpg


Now, you are going to have to remove the LCD screen. It simple as long as you are careful. get a screwdriver under the top edge of the LCD screen and pry it up carefully.
dashboard040.jpg


Next pull the LCD screen out. It will come off just don't yank it.
Then use a tiny screwdriver to remove the plastic piece under where the LCD screen was. I didn't remove the LCD screen yet but its way easier.
dashboard041.jpg


There are three LEDs under there. Next remove the three screws on the back and unclip the two clips to remove the back piece.
dashboard034.jpg


Then unclip the four clips to remove the circuit board from the front plastic piece. (NOTE: You MUST remove the LCD screen to get the circuit board off.)
dashboard035.jpg


Now you should have just the circuit board. I marked all the LEDs that you will need to change for the back light in red and purple. The purple is the odometer and the red is the back light for the gauges. This doesn't change the needle color or any other lights, like the check engine light.
dashboard044.jpg


So solder away! After you are done put everything back and poof!!! You have a better dashboard. One more thing. before you solder, look at the LEDs closely. you will notice that one corner has a notch in it. Make sure that you put the new LEDs in with notch in the same corner. THIS IS VERY IMPORTANT! If you don't do this the LEDs won't work.


dashboard046.jpg
 
Last edited:

X-Rizzo

New Member
Joined
Jan 14, 2007
Messages
2,363
Reaction score
0
The blue looks sick but man that's a lot of work!
 

stretch200

New Member
Joined
Jan 13, 2007
Messages
638
Reaction score
0
it's less work than the black headlight mod!! Well, not quite. But it takes less time. :biggrin:
 

K2

Administrator
Staff member
Joined
Dec 10, 2006
Messages
9,069
Reaction score
44
Excellent write-up, thank you for taking the time to do this and submit it to the site! Just one question... what are you doing in your truck? Man, I thought my mats were dirty. :biggrin:
 

stretch200

New Member
Joined
Jan 13, 2007
Messages
638
Reaction score
0
hahaha! I know. I run a landscaping company, so I'm always walking at new jobs sites in the mud. Since its the rainy season in Oregon, there's not much I can do.
 

CBRBob

Active Member
Joined
Jan 14, 2007
Messages
1,721
Reaction score
0
So do your LEDs dim like the stockers?
 

nxrunner

New Member
Joined
Jan 14, 2007
Messages
1,631
Reaction score
0
LOOKS AWESOME. NICE MOD BUT DEFINETLY A LOT OF WORK. I DONT WANT TO REMOVE THE BOTTOM HALF OF MY DASH BECAUSE SEVERAL PEOPLE ARE HAVING TROUBLE WITH IT STAYING UP (SOMETHING ABOUT A LOOSE CLIP).

GREAT WRITE UP.

* SUGESTION * INVEST IN SOME WEATHERTECH MATS. YOUR X IS FAR TOO NICE TO BE MESSING UP WITH ALL THAT MUD. :top:

--SORRY FOR ALL CAPS. I DIDNT REALIZE IT UNTIL I WAS ALMOST FINISHED TYPING.---
 

XRobber

New Member
Joined
Jan 14, 2007
Messages
1,213
Reaction score
0
I ordered the super white ones last night...
I cant wait till they get here.
 

stretch200

New Member
Joined
Jan 13, 2007
Messages
638
Reaction score
0
LOOKS AWESOME. NICE MOD BUT DEFINETLY A LOT OF WORK. I DONT WANT TO REMOVE THE BOTTOM HALF OF MY DASH BECAUSE SEVERAL PEOPLE ARE HAVING TROUBLE WITH IT STAYING UP (SOMETHING ABOUT A LOOSE CLIP).

GREAT WRITE UP.

* SUGESTION * INVEST IN SOME WEATHERTECH MATS. YOUR X IS FAR TOO NICE TO BE MESSING UP WITH ALL THAT MUD. :top:

--SORRY FOR ALL CAPS. I DIDNT REALIZE IT UNTIL I WAS ALMOST FINISHED TYPING.---

yea I know. I definitely need better mats. I want the weathertech ones but I'm short on cash. that's why I haven't don't anything but "free" or cheap mods. I have way too many bills. :motz:
 

K2

Administrator
Staff member
Joined
Dec 10, 2006
Messages
9,069
Reaction score
44
I ordered the super white ones last night...
I cant wait till they get here.

Hmmmm - someone is getting ready for X-Fest with all these new mods. :biggrin: Can't wait to see your truck Rob.
 

Mezmerized

New Member
Joined
Feb 27, 2007
Messages
10
Reaction score
0
Well being a new member and all I was wonder if anyone has found any other sources for these LED's.. Ive checked with multiple local electronics shops and none carry the Footprint style LED's. So just assuming that I have to order it...

Any Ideas?
 

stretch200

New Member
Joined
Jan 13, 2007
Messages
638
Reaction score
0
there are a couple others you can get it from. Give me a few minutes, I'll try to find some.
 

Stevenredx

New Member
Joined
Jan 14, 2007
Messages
13,448
Reaction score
4
very nice write up... now i may have to attempt this aswell
 

CBRBob

Active Member
Joined
Jan 14, 2007
Messages
1,721
Reaction score
0
Since LEDs are polarized, how do you know which way they go in? Can you check it without totally reassembling?
 

stretch200

New Member
Joined
Jan 13, 2007
Messages
638
Reaction score
0
Since LEDs are polarized, how do you know which way they go in? Can you check it without totally reassembling?

yes. on the LEDs one corner has an angle on it. Just make sure you put the new one in with the angle in the same corner. I should probably add that to the write-up. duh.:biggrin:
 
Top Bottom