Grumpy
New Member
- Joined
- Jun 16, 2007
- Messages
- 5,051
- Reaction score
- 1
This is my first write up so bear with me if it doesn't meet your expectation. Pics to follow, Photobucket is not working for me at the moment. Will add pics when permitted.
Edit: Pics added. My Photobucket is still out, so ImageShack it is.
Edit: Photobucket pics and pulley holder tools added, 11/16/'08
Tools needed;
Lift, ramps or floor jack & jack stands
two 8mm x 1.25 bolt, 2"+ long
3/8" drive ratchet + 14mm deep socket
1/2" drive breaker bar +22mm socket
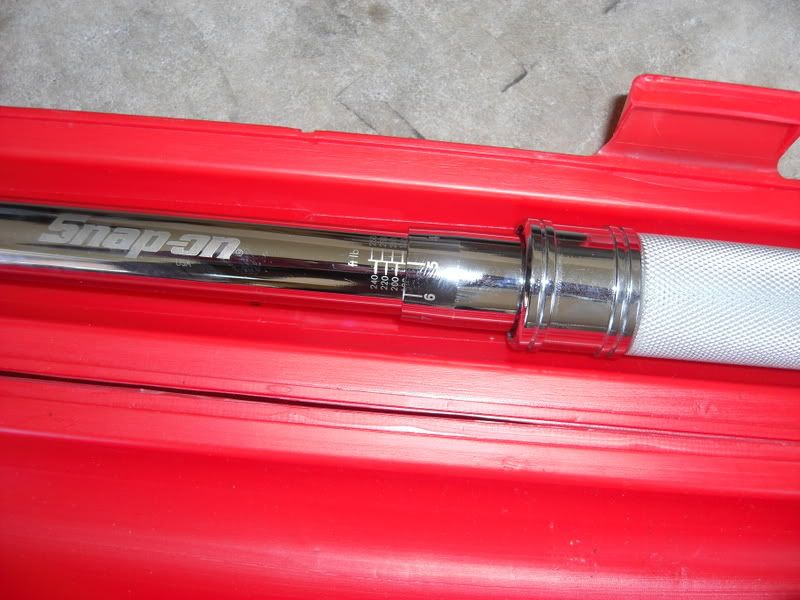
1/2" drive Torque wrench capable of 200 lbs/ft.
Wrenching buddy is recommended but not necessary
First, front end need to be picked up as installation will be coming up from the bottom. Lift or ramps are recommended. If service jack is use, minimum of 2 jack stand are needed.
The accessories belt has to come off. Use 14mm socket and rotate the tensioner pulley counterclockwise to relieve the tension. This is the pulley between water pump/ radiator fan and AC compressor. Belt should come right out. Pay close attention of the belt routing.
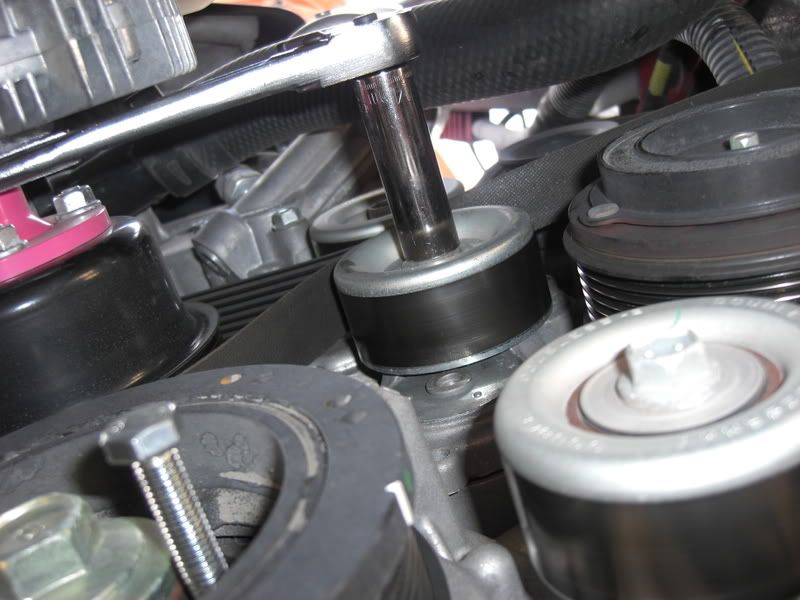
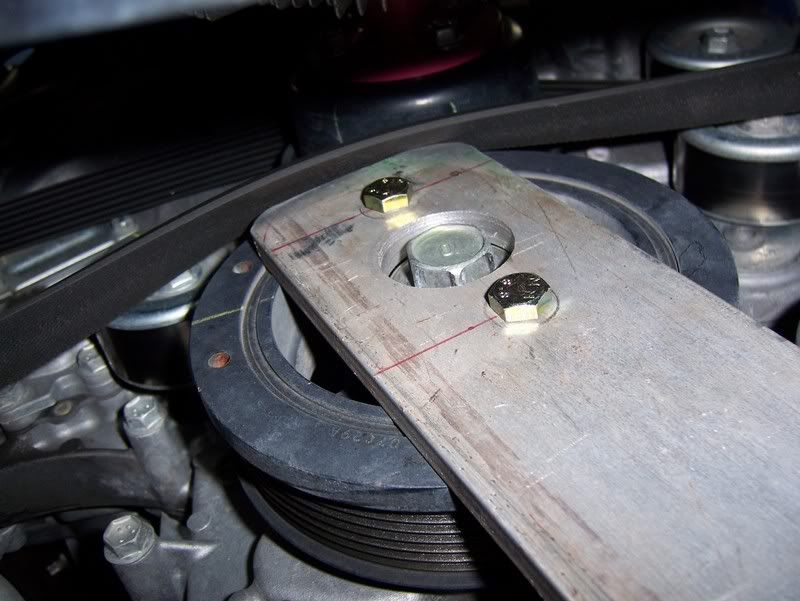
Install two 8mm x 1.25 bolt into threaded holes on the pulley. They need to be around 2"+ long in order to work properly. Turn them all the way in, through the pulley, 'til it made contact with engine block. Then tighten them a little bit more until its snug, about 1/2 - 3/4 turn, this will serve as a pulley holder when removing the crank bolt.

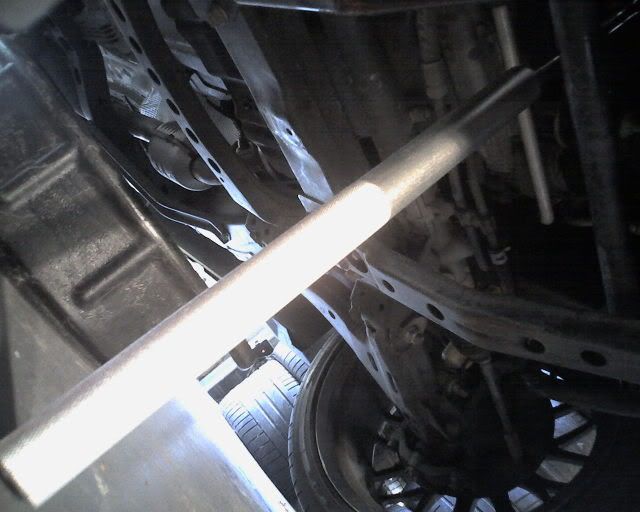
Use 22mm on 1/2" drive breaker bar, and put some muscle into it. Remember lefty loosey.

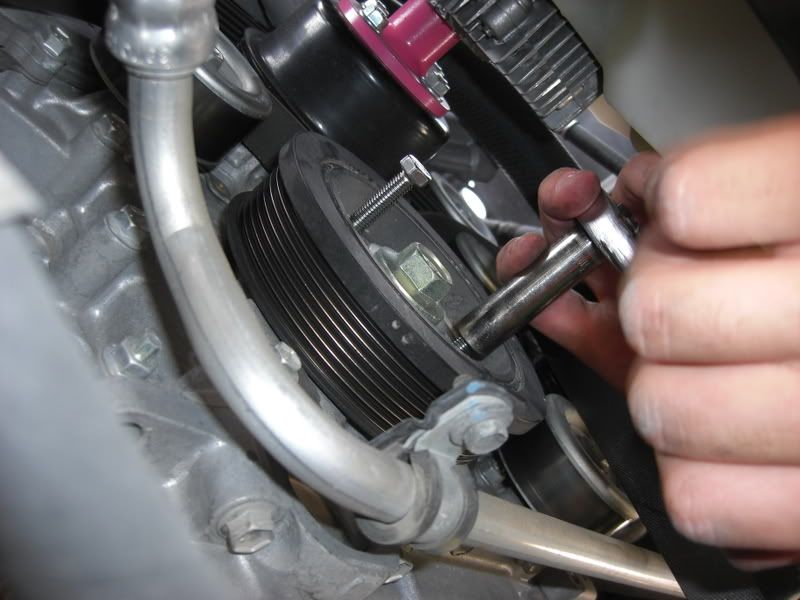
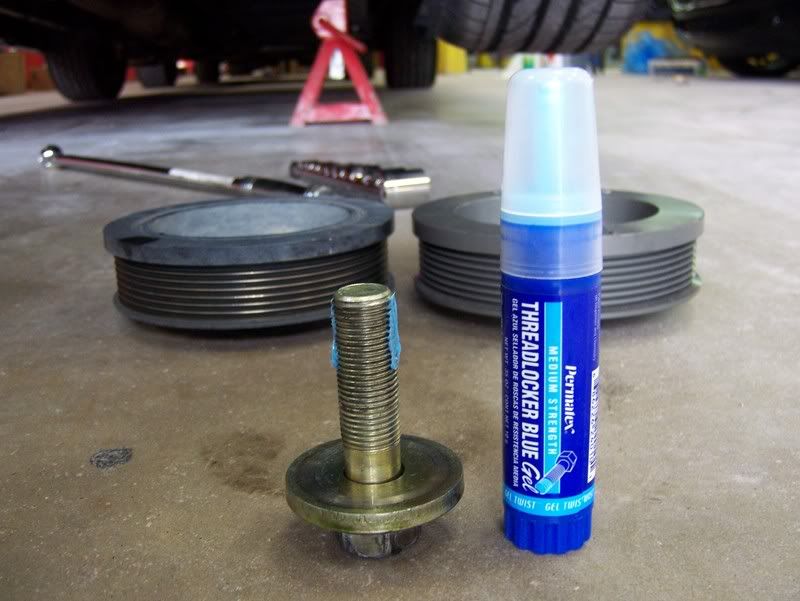
After the crank pulley is out, continue tightening the two 8mm bolts. This will push against engine block thus pushing out the stock crank pulley. Pay close attention of where the key way is on the pulley.
Wipe off any dirt or oil residue on the seal, and apply some fresh motor oil to help ease installation of the pulley. Work the pulley in by hand as far as it will go, making sure the belt is not in the way.
Apply some locktite and reinstall the crank pulley bolt using ratchet. Tighten until the pulley is seated. At this point, you can only tighten so much until the crankshaft start to turn. Reinstall two 8mm bolts to hold the pulley and use torque wrench to do the final tighten. Set torque wrench to 185 lbs/ft.


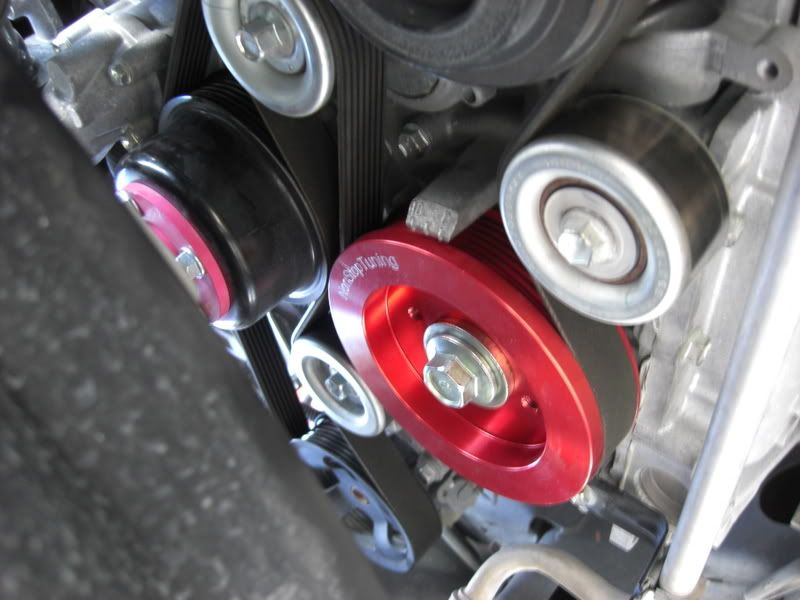
Rotate the tensioner and reinstalled accessories belt. Double check to make sure that the belt is routed correctly and properly aligned with all pulleys.

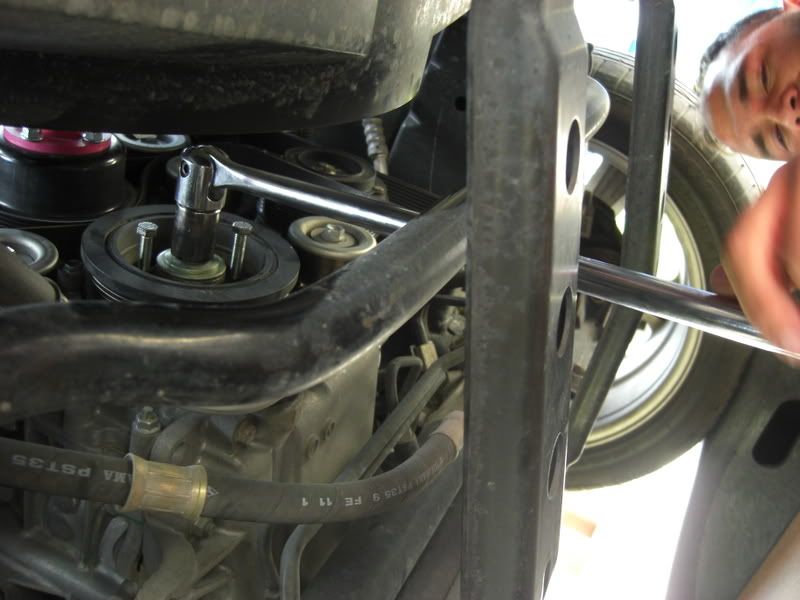
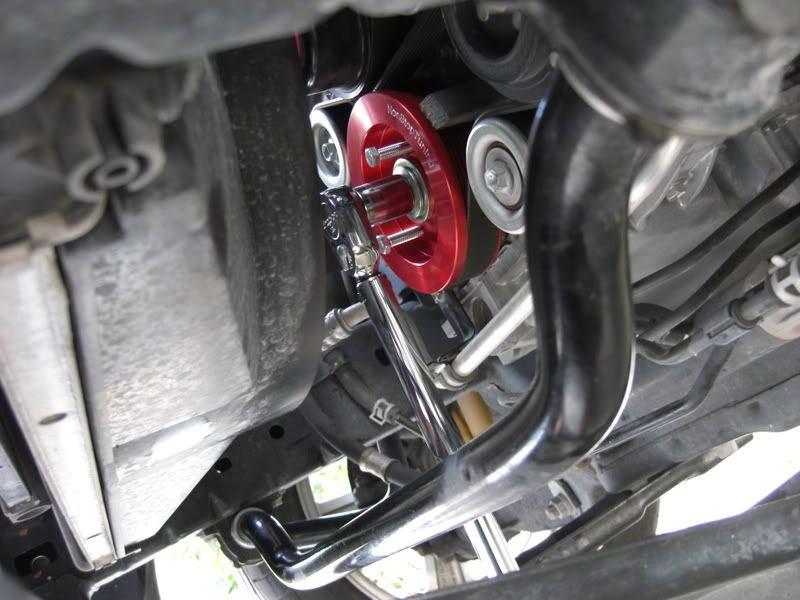
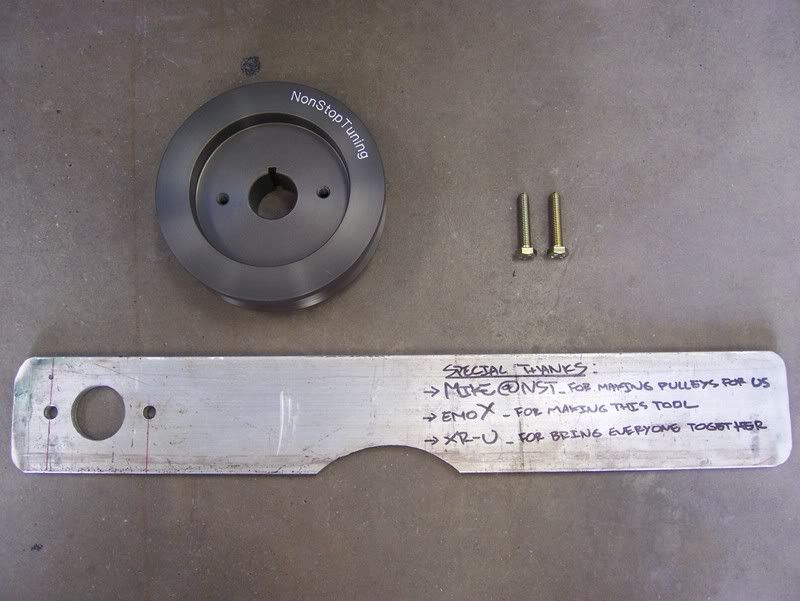
Here is the pulley holder tool. Its notch to clear A/C compressor, but you can go without. Let it brace against side rails while loosening or tightening the crank pulley bolt.
Disclaimer: I'm not responsible for injury due to negligence, improper use of tools, and destruction of property. This instruction is to be use only as a guide. Use your best judgement when making decision. Legal mumble jumble blah blah blah. Also not responsible for improve throttle response, increase acceleration, and any horsepower gain during this installation. Have fun and happy modding.:top:
Speicial Thanks to Torspd (Mark) for taking these great pics, Mike from NST for coming out to lend a hand and trouble shoot, and the H-town crew for helping out. 4 pulleys were installed that day.
Edit: Pics added. My Photobucket is still out, so ImageShack it is.
Edit: Photobucket pics and pulley holder tools added, 11/16/'08
Tools needed;
Lift, ramps or floor jack & jack stands
two 8mm x 1.25 bolt, 2"+ long
3/8" drive ratchet + 14mm deep socket
1/2" drive breaker bar +22mm socket
1/2" drive Torque wrench capable of 200 lbs/ft.
Wrenching buddy is recommended but not necessary
First, front end need to be picked up as installation will be coming up from the bottom. Lift or ramps are recommended. If service jack is use, minimum of 2 jack stand are needed.
The accessories belt has to come off. Use 14mm socket and rotate the tensioner pulley counterclockwise to relieve the tension. This is the pulley between water pump/ radiator fan and AC compressor. Belt should come right out. Pay close attention of the belt routing.

Install two 8mm x 1.25 bolt into threaded holes on the pulley. They need to be around 2"+ long in order to work properly. Turn them all the way in, through the pulley, 'til it made contact with engine block. Then tighten them a little bit more until its snug, about 1/2 - 3/4 turn, this will serve as a pulley holder when removing the crank bolt.

Use 22mm on 1/2" drive breaker bar, and put some muscle into it. Remember lefty loosey.

After the crank pulley is out, continue tightening the two 8mm bolts. This will push against engine block thus pushing out the stock crank pulley. Pay close attention of where the key way is on the pulley.
Wipe off any dirt or oil residue on the seal, and apply some fresh motor oil to help ease installation of the pulley. Work the pulley in by hand as far as it will go, making sure the belt is not in the way.
Apply some locktite and reinstall the crank pulley bolt using ratchet. Tighten until the pulley is seated. At this point, you can only tighten so much until the crankshaft start to turn. Reinstall two 8mm bolts to hold the pulley and use torque wrench to do the final tighten. Set torque wrench to 185 lbs/ft.


Rotate the tensioner and reinstalled accessories belt. Double check to make sure that the belt is routed correctly and properly aligned with all pulleys.

Here is the pulley holder tool. Its notch to clear A/C compressor, but you can go without. Let it brace against side rails while loosening or tightening the crank pulley bolt.
Disclaimer: I'm not responsible for injury due to negligence, improper use of tools, and destruction of property. This instruction is to be use only as a guide. Use your best judgement when making decision. Legal mumble jumble blah blah blah. Also not responsible for improve throttle response, increase acceleration, and any horsepower gain during this installation. Have fun and happy modding.:top:
Speicial Thanks to Torspd (Mark) for taking these great pics, Mike from NST for coming out to lend a hand and trouble shoot, and the H-town crew for helping out. 4 pulleys were installed that day.
Last edited: